
Tile Cutter Manual: A Comprehensive Guide (Updated 12/18/2025)
This guide details various tile cutter types – manual, electric, and wet saws – offering insights into their uses and helping you select the best tool for your tiling project.
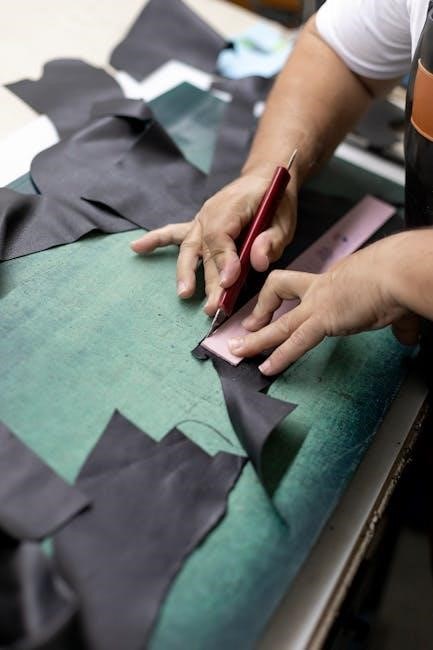
Manual tile cutters represent a foundational tool for both DIY enthusiasts and professional tilers, offering a straightforward method for achieving precise cuts. These cutters excel at cleanly dividing ceramic and certain stoneware tiles, relying on a scoring and snapping mechanism rather than abrasive blades or water cooling. Their lightweight design and portability make them ideal for on-site work or smaller projects.
Unlike electric counterparts, manual cutters require physical effort, providing greater control for intricate cuts. They are particularly well-suited for straight-line cuts, minimizing dust and offering a quieter operation. Understanding the principles behind these tools – scoring with a tungsten carbide wheel and leveraging a breaking force – is key to successful tile installation. This guide will explore the nuances of manual tile cutting.
What is a Manual Tile Cutter?
A manual tile cutter is a hand-operated tool designed for precisely scoring and breaking tiles, primarily ceramic and thinner stoneware. It functions by using a hardened tungsten carbide scoring wheel to create a shallow groove on the tile’s surface. This score line weakens the tile, allowing it to be snapped cleanly along that line using a built-in breaking mechanism.
These cutters don’t require electricity, making them portable and convenient for various job sites. They are favored for their simplicity, affordability, and ability to produce relatively dust-free cuts compared to wet saws. Manual cutters are perfect for straight cuts, offering a controlled and efficient method for preparing tiles for installation. They are a staple for many tiling projects, offering a reliable alternative to powered options.
The History of Manual Tile Cutting
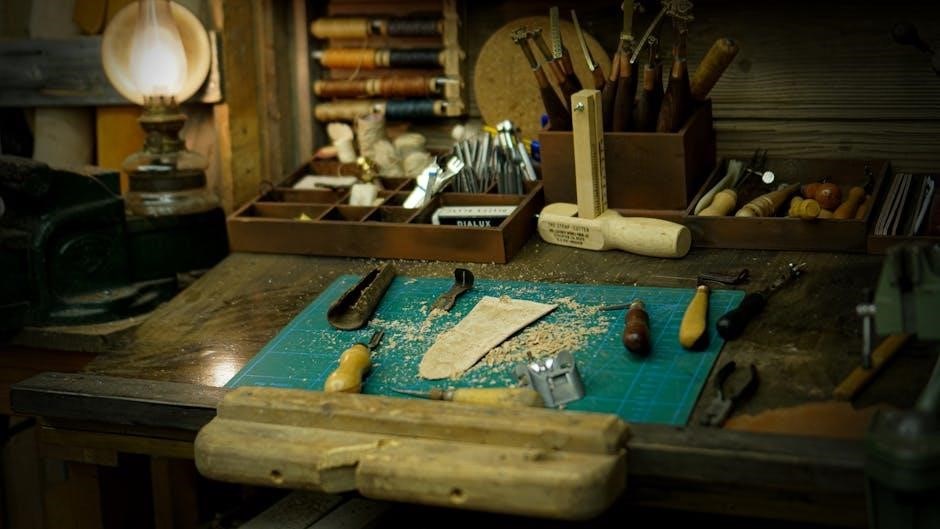
The origins of manual tile cutting trace back to the need for precise tile work in architectural designs, evolving alongside the increasing popularity of tiled surfaces. Early methods relied heavily on skilled artisans using hand tools like tile nippers and scoring knives, demanding significant expertise and time.
The development of the first dedicated manual tile cutters emerged in the early 20th century, streamlining the process and improving accuracy. These early models featured a basic scoring wheel and lever system. Over decades, designs were refined, incorporating features like adjustable angle guides and improved breaking mechanisms. Today’s manual cutters represent a legacy of innovation, offering a balance of simplicity, affordability, and effectiveness for both professionals and DIY enthusiasts.

Types of Manual Tile Cutters
Manual tile cutters come in several forms: snap cutters for quick, straight cuts; wheel cutters for scoring; and pistol grip cutters offering enhanced control and portability.
Snap Tile Cutters
Snap tile cutters are a popular choice for DIY enthusiasts and professionals alike, prized for their simplicity and efficiency in making straight cuts on ceramic and porcelain tiles. These cutters utilize a tungsten carbide scoring wheel to create a precise line on the tile surface.
The defining feature is the snapping mechanism; after scoring, downward pressure on the handle causes the tile to cleanly break along the scored line. They are lightweight and fast, making them ideal for quick jobs and large-scale installations. However, snap cutters are generally best suited for tiles with a thickness of less than 10mm, and complex cuts or very hard materials may prove challenging. Proper technique, including consistent scoring pressure, is crucial for achieving clean, accurate breaks.
Wheel Tile Cutters
Wheel tile cutters, often considered a foundational type of manual cutter, rely on a rotating wheel – typically made of tungsten carbide – to score the surface of the tile. This scoring creates a weakened line, preparing the tile for a clean break. These cutters are particularly effective for ceramic tiles and thinner stoneware, offering a balance of control and speed.

Unlike snap cutters, wheel cutters often require a separate breaking tool or lever to apply pressure and separate the tile along the scored line. They are generally more affordable and portable than other options, making them suitable for smaller projects or on-site work. Achieving optimal results depends on maintaining consistent pressure during scoring and using a sharp, well-maintained wheel.
Pistol Grip Tile Cutters
Pistol grip tile cutters represent a more ergonomic and powerful approach to manual tile cutting. Their design, resembling a pistol grip, allows for increased leverage and control during the scoring process. This enhanced grip is particularly beneficial when working with harder tiles or requiring longer, more precise cuts.
These cutters typically feature a tungsten carbide scoring wheel and a built-in breaking mechanism activated by squeezing the pistol grip. This integrated system simplifies the cutting process, reducing the need for separate tools. They are lightweight and portable, making them ideal for various tiling applications. Proper technique, including firm and even pressure, is crucial for achieving clean, accurate breaks with a pistol grip cutter.
Components of a Manual Tile Cutter
Manual tile cutters consist of a scoring wheel, breaking mechanism, base with a guide rail, and side supports for angle adjustments, ensuring precise tile division.
Scoring Wheel
The scoring wheel is a critical component, typically made of tungsten carbide, designed to create a precise, shallow line on the tile’s surface. This initial score weakens the tile, preparing it for a clean break. The quality of the wheel directly impacts the cut’s accuracy and ease.
Different tile materials require different wheel types; some are better suited for ceramic, while others excel with porcelain. Maintaining a sharp scoring wheel is paramount – a dull wheel will struggle to create a clean score, leading to uneven breaks or chipping. Regular cleaning removes debris that can hinder performance. Proper pressure application during scoring is also vital; too little won’t create a sufficient line, while too much can damage the wheel or the tile itself.
Breaking Mechanism
The breaking mechanism, often a lever or foot pedal, applies focused pressure along the scored line to cleanly separate the tile. This system utilizes the weakened line created by the scoring wheel, initiating a controlled fracture. The effectiveness of this mechanism relies heavily on the precision of the initial score.
Manual tile cutters employ varying breaking designs; some offer a gradual pressure increase for finer control, while others provide a swift, decisive break. Ensuring the tile is properly aligned with the breaking point is crucial to prevent unwanted chipping or cracking. The quality of the lever’s construction and its pivot point significantly influence the force applied and the resulting break’s smoothness. Regular inspection for wear and tear is essential for consistent performance.
Base and Guide Rail
The base and guide rail are fundamental to a manual tile cutter’s accuracy. A robust base provides stability during operation, minimizing vibrations that could compromise the score line. The guide rail, typically constructed from hardened steel, ensures the scoring wheel travels in a perfectly straight path.
Precise alignment of the guide rail is paramount; any deviation will result in angled or uneven cuts. Many cutters feature adjustable guide rails to accommodate different tile sizes and thicknesses. Look for models with clearly marked measurements for consistent and repeatable cuts. The base material’s weight contributes to overall stability, especially when working with larger or harder tiles. A well-maintained base and guide rail are essential for professional-quality results.
Side Supports & Angle Adjustment
Side supports are crucial for securely holding tiles in place during scoring and breaking, preventing movement that could lead to inaccurate cuts or tile damage. These supports often feature rubberized pads to protect the tile surface from scratches and provide a firm grip.
Angle adjustment mechanisms allow for creating bevel cuts, essential for borders, corners, and decorative tile arrangements. Higher-quality cutters offer precise angle settings, often with a locking system to maintain the desired angle throughout the cut. The range of adjustable angles varies between models, so consider your project needs. Properly adjusted side supports and angle settings guarantee clean, professional-looking angled tile installations.

How to Use a Manual Tile Cutter: Step-by-Step
Mastering manual tile cutting involves preparing the tile, scoring with consistent pressure, and carefully breaking along the scored line for clean results.
Preparing the Tile
Before initiating any cuts, meticulous tile preparation is crucial for achieving professional-looking results. Begin by thoroughly cleaning the tile surface, removing any dust, debris, or grease that could impede the scoring wheel’s performance. Inspect each tile for pre-existing cracks or imperfections; avoid cutting tiles with visible flaws.

Accurately measure and mark the desired cut line using a tile marker or pencil, ensuring a clear and precise indication for the scoring wheel. For multiple cuts, consider using a straight edge or speed square to guarantee consistent and straight lines. Finally, place the tile securely onto the base of the manual tile cutter, aligning the marked line with the scoring mechanism. Proper preparation minimizes chipping and ensures a clean break.
Scoring the Tile
Once the tile is securely positioned, initiate the scoring process by applying firm, even pressure as you guide the scoring wheel along the marked line. A single, continuous pass is generally recommended, especially for porcelain tiles, to create a clean and defined score. Avoid applying excessive force, as this can cause the wheel to dig into the tile, resulting in an uneven or jagged line.
Maintain a consistent speed throughout the scoring process, ensuring the wheel remains in contact with the tile surface. The goal is to create a shallow, yet visible, groove that weakens the tile along the desired cut line. A properly executed score is the foundation for a successful and clean break, minimizing the risk of chipping or cracking.
Breaking the Tile
After scoring, position the tile so the score line aligns directly over the breaking mechanism of the cutter. Gently apply downward pressure on the breaking lever, ensuring it engages with the scored line. A smooth, controlled motion is crucial; avoid jerky movements that could cause uneven breaks or chipping. The breaking mechanism leverages the weakened score to cleanly separate the tile.
For thicker or more brittle tiles, a slight rocking motion can assist in initiating the break. Listen for a distinct snap, indicating successful separation. Inspect the broken edges for any signs of chipping or unevenness. If necessary, lightly file down any sharp edges to ensure a safe and professional finish.
Safety Precautions
Always wear safety glasses to protect your eyes from flying debris during scoring and breaking. Gloves are recommended to prevent cuts from sharp tile edges. Ensure a stable and well-lit work surface to maintain control and accuracy. Never force the scoring wheel; excessive pressure can lead to breakage and potential injury.
Keep hands clear of the breaking mechanism during operation. Inspect the tile cutter regularly for any damaged parts, and do not use it if it’s faulty. Dispose of broken tile pieces carefully, as they can be extremely sharp. When using electric tile cutters, adhere to all manufacturer’s safety guidelines.

Cutting Different Tile Types with a Manual Cutter
Manual cutters excel with ceramic and thin stoneware, while porcelain requires a tungsten carbide wheel and firm, even scoring pressure for clean cuts.
Ceramic Tiles
Ceramic tiles are generally the easiest material to cut with a manual tile cutter, making them ideal for beginners. The softer composition of ceramic allows the scoring wheel to create a clean, defined line with minimal effort.
For optimal results, ensure the tile is firmly supported and apply consistent pressure during the scoring process. A single, deliberate score is usually sufficient. Following the score, utilize the breaking mechanism to achieve a crisp, straight break.
Manual tile cutters are particularly well-suited for straight cuts on ceramic tiles, offering a lightweight and fast solution for many tiling projects. Remember to always prioritize safety and wear appropriate eye protection.
Porcelain Tiles
Porcelain tiles, being denser and harder than ceramic, require a more robust approach when using a manual tile cutter. It’s crucial to utilize a cutter equipped with a tungsten carbide scoring wheel, specifically designed to handle this tougher material.
Apply firm, even pressure while scoring, but importantly, only score once. Multiple passes can cause chipping or cracking due to the porcelain’s density. A sharp scoring wheel is paramount for a clean cut.
While manual cutters can work on porcelain, especially thinner varieties, consider that thicker or larger porcelain tiles may necessitate a wet saw for cleaner, more reliable results. Always prioritize safety and wear eye protection.
Glass Tiles
Cutting glass tiles with a manual cutter demands extreme caution and a specialized approach. Standard scoring wheels may cause shattering; therefore, a wheel specifically designed for glass is essential. These wheels typically have a smoother, finer grain.
Apply very light, consistent pressure during scoring – avoid excessive force. Multiple, gentle passes are often preferable to a single, heavy one. After scoring, a precise and controlled break is critical to prevent jagged edges or complete fragmentation.
Due to the brittle nature of glass, manual cutting is best suited for smaller pieces and simpler shapes. For intricate designs or larger tiles, a wet saw with a diamond blade is highly recommended for superior results and safety.
Maintaining Your Manual Tile Cutter
Regular maintenance – cleaning the scoring wheel and lubricating moving parts – ensures optimal performance and extends the lifespan of your manual tile cutter.
Cleaning the Scoring Wheel
A clean scoring wheel is paramount for achieving precise and effortless tile cuts. Over time, residue from tile dust and materials accumulates on the wheel’s surface, hindering its ability to create a clean score line. Regularly inspect the wheel for buildup; a dirty wheel can lead to difficulty scoring and potentially damage the tile.
To clean, use a specialized scoring wheel cleaner or isopropyl alcohol and a stiff brush. Gently scrub the wheel’s circumference, removing all traces of debris. Avoid abrasive cleaners, as they can dull the tungsten carbide. After cleaning, ensure the wheel is completely dry before resuming use. Consistent cleaning will significantly improve cutting performance and prolong the wheel’s lifespan, saving you replacement costs and ensuring consistently professional results.
Lubricating Moving Parts
Regular lubrication is crucial for maintaining the smooth operation and longevity of your manual tile cutter. Friction between moving components, such as the breaking mechanism and pivot points, can cause wear and tear, hindering performance and potentially leading to breakage. Apply a light machine oil or silicone-based lubricant to these areas.
Focus on the lever arm, the sliding rails, and any points where metal surfaces rub against each other. Avoid using heavy oils or greases, as they can attract dust and create a sticky residue. Wipe away any excess lubricant after application. Consistent lubrication ensures effortless tile breaking, reduces strain on the cutter, and prevents premature component failure, ultimately extending the tool’s useful life and maintaining cutting accuracy.
Replacing the Scoring Wheel
Over time, the scoring wheel of your manual tile cutter will become dull, impacting its ability to create a clean, consistent score line. Replacing it is essential for maintaining accurate cuts. First, carefully remove the old scoring wheel, typically secured with a small screw or retaining clip – consult your cutter’s manual for specifics.
Ensure the replacement wheel is the correct type and size for your model; tungsten carbide wheels are common for ceramic and porcelain. Install the new wheel, tightening the screw or clip securely, but avoid over-tightening. A sharp scoring wheel is vital for preventing chipping and ensuring clean breaks, restoring the cutter’s performance to its optimal level and extending its overall usability.

Troubleshooting Common Issues
Common problems include difficulty scoring, uneven breaks, and chipping. Addressing these issues often involves a dull wheel, improper pressure, or incorrect tile support.
Difficulty Scoring
Encountering trouble scoring tiles with your manual cutter is a frequent issue. Often, a dull or damaged scoring wheel is the primary culprit, preventing a clean, consistent line. Ensure the wheel is sharp and free of debris; cleaning and eventual replacement are crucial.
Insufficient pressure during scoring can also lead to incomplete lines. Apply firm, even pressure in a single, smooth motion – avoid multiple passes. The type of tile matters too; harder materials like porcelain require more force. Finally, verify the tile is properly supported and aligned within the cutter’s guides for optimal scoring results.
Uneven Breaks
Achieving clean, straight breaks is vital when using a manual tile cutter. Uneven breaks often stem from an insufficient or improperly executed scoring line. Revisit the scoring process, ensuring firm, consistent pressure and a single, uninterrupted pass with the wheel.
The breaking mechanism itself can contribute to unevenness. Confirm it’s aligned correctly and applying force directly along the scored line. Also, consider the tile’s composition; some materials are more prone to chipping. Support the tile adequately during the break to prevent unwanted movement and ensure a clean separation along the intended score.
Chipping or Cracking
Tile chipping or cracking during cutting frequently indicates excessive force applied during the breaking process. Avoid applying downward pressure; instead, focus on a smooth, controlled snap along the scored line. Inspect the scoring wheel for dullness or damage, as a compromised wheel can cause stress points leading to fractures.
Certain tile types, particularly porcelain and glass, are more susceptible to chipping. When working with these materials, consider using a specialized blade or cutter designed for their specific properties. Proper tile support is crucial; ensure the tile is fully supported to prevent flexing and cracking during the break. Slow and steady pressure is key!