Wii Operations Manual for Troubleshooting: A Comprehensive Guide
Navigating the Wii’s functionalities can present challenges; this manual offers solutions for common issues like synchronization, downloads, and button responsiveness.
Addressing console freezing, GameCube disc drive problems, and laser calibration are also covered, alongside clock errors and AC adapter resets.
Furthermore, guidance on component video cables, console revisions, system memory, SD card issues, and MotionPlus accessories is included for optimal performance.
Finally, resolving online connection problems, WiiWare errors, video output issues, software update failures, and system recovery procedures are detailed.
Welcome to the comprehensive guide designed to resolve issues with your Nintendo Wii! This manual aims to empower users with the knowledge to diagnose and fix a wide array of problems, ensuring a smooth and enjoyable gaming experience. The Wii, while a revolutionary console, isn’t immune to technical hiccups, ranging from simple remote synchronization issues to more complex system failures.
This guide is structured to address these challenges systematically. We’ll begin with common error codes and progress through troubleshooting steps for peripherals like the Wii Remote and Nunchuk. We’ll also delve into issues concerning download speeds, console freezing, and the GameCube disc drive. Understanding your console’s revision is also key, as certain models may exhibit unique behaviors.
Whether you’re encountering problems with video output, software updates, or even the AC adapter, this manual provides detailed instructions. We’ll cover system recovery options and even a factory reset as a last resort. Remember, preventative maintenance, like regularly checking for software updates, can minimize future issues. Let’s begin restoring your Wii to its full potential!
Understanding Common Wii Error Codes
Wii error codes are the console’s way of communicating specific problems, acting as crucial diagnostic tools. Recognizing these codes is the first step towards effective troubleshooting. One frequently encountered error is FORE000006, typically indicating an incorrect system clock. Correcting the date and time settings usually resolves this issue, but a complete power cycle may also be necessary.
Other codes relate to disc reading errors, often stemming from a dirty or damaged disc, or a malfunctioning disc drive. Error messages concerning online connectivity usually point to network configuration problems or temporary server outages. System memory errors can manifest as freezing or crashing, potentially requiring a system recovery or, as a last resort, a factory reset.
It’s important to note that error codes aren’t always definitive. Sometimes, a single code can indicate multiple underlying issues. Consulting the Nintendo support website, referencing online forums, and carefully observing the circumstances surrounding the error’s appearance can provide valuable context. Documenting the code and the situation will aid in finding a solution.
Wii Remote Synchronization Issues
Synchronization problems with the Wii Remote are among the most common user frustrations. The core issue often stems from the remote losing connection with the Wii console. The primary solution involves re-synchronizing the remote, achieved by pressing the red SYNC button on both the console and the remote itself. Ensure no obstructions are between the remote and the sensor bar.
Low batteries are a frequent culprit; replace or recharge the batteries to ensure sufficient power. Interference from other wireless devices can also disrupt the signal. Try moving the console away from other electronics or temporarily disabling nearby wireless networks. If multiple remotes are experiencing issues, it suggests a broader interference problem.
Persistent issues might indicate a faulty sensor bar or a problem with the remote’s internal components. Testing with a different sensor bar or remote can help isolate the source of the problem. Regularly cleaning the sensor bar lens can also improve connectivity. Remember to only synchronize one remote at a time.
Troubleshooting Non-Responsive Wii Remote Buttons
Non-responsive buttons on the Wii Remote can significantly hinder gameplay. A common first step is to ensure the remote has fresh batteries or is adequately charged. Low power can cause intermittent or complete button failure. Inspect the battery compartment for corrosion, as this can disrupt the connection.
Dirt and debris accumulating under the buttons are frequent causes. Gently cleaning around the buttons with compressed air or a soft, dry cloth can often resolve the issue. Avoid using liquids, as they can damage the internal components. If cleaning doesn’t help, try resetting the remote by removing the batteries and reinserting them after a few minutes.
Internal damage, often from drops or impacts, can lead to unresponsive buttons. In such cases, the remote may require professional repair or replacement. Attempting to disassemble the remote yourself can void any warranty and potentially cause further damage. Consider testing the remote with different games to rule out game-specific glitches.
Nunchuk Connectivity Problems
Experiencing issues with your Nunchuk connecting to the Wii Remote? Several factors can contribute to this. First, verify the Nunchuk is firmly plugged into the Wii Remote’s connector port. A loose connection is the most common culprit. Try disconnecting and reconnecting it several times to ensure a secure fit.
Interference from other wireless devices can disrupt the signal. Move away from potential sources of interference, such as Bluetooth devices, microwaves, or other wireless routers. Ensure the Wii sensor bar is positioned correctly and isn’t obstructed. A clear line of sight between the sensor bar and the Wii Remote is crucial for stable connectivity.
Battery issues within the Wii Remote can also affect Nunchuk functionality. Replace the batteries in the Wii Remote with fresh ones. If the problem persists, try synchronizing the Wii Remote again with the console. A faulty Nunchuk may require replacement; testing with a known working Nunchuk can help diagnose the issue.
Addressing Slow Download Speeds
Frustrated with sluggish download speeds on your Wii? Several factors can impact performance. First, confirm your internet connection is stable and functioning correctly with other devices. A weak Wi-Fi signal is a common cause; try moving the Wii closer to your wireless router or consider using a wired connection via Ethernet cable for a more reliable link.
WiiWare and Virtual Console downloads can be large, so patience is key. However, consistently slow speeds indicate a potential issue. Check for background processes or other devices consuming bandwidth on your network. Temporarily disconnecting these can free up resources for the Wii.
Nintendo’s servers can occasionally experience high traffic, leading to slower download times. Try downloading during off-peak hours. Clearing the Wii’s cache can also help; navigate to the Wii Options menu and perform a system reset. If problems persist, consult your internet service provider to verify your connection speed and troubleshoot any network-related issues.
Fixing Wii Console Freezing or Crashing
Experiencing unexpected freezes or crashes during gameplay? This can be disruptive, but several troubleshooting steps can resolve the issue. Initially, attempt a soft reset by pressing the power button on the console itself – not the controller – for a few seconds. This often resolves minor glitches without data loss.
If the console remains unresponsive, a hard reset might be necessary. Disconnect the power adapter from both the Wii and the wall outlet. Wait approximately one to two minutes before reconnecting the adapter and powering on the console. This clears the system’s memory.
Persistent freezing could indicate a software problem. Ensure your Wii system software is up-to-date. Check for available updates in the Wii Settings menu. Overheating can also cause crashes; ensure the console has adequate ventilation and isn’t enclosed in a tight space. If issues continue, a system recovery or factory reset might be required as a last resort, but remember to back up any important data beforehand.
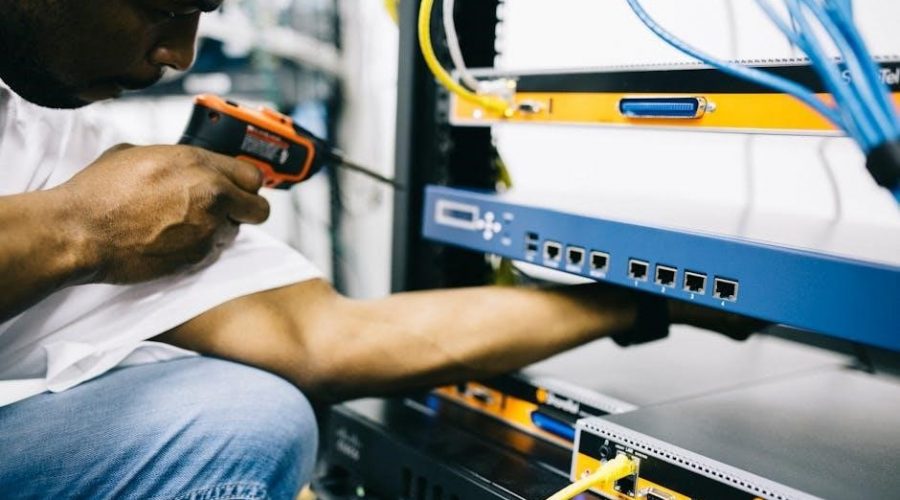
GameCube Disc Drive Troubleshooting
The Wii’s backward compatibility with GameCube games is a valued feature, but the disc drive can sometimes encounter issues. If a GameCube disc isn’t recognized, first ensure the disc is clean and free of scratches. Gently cleaning the disc with a soft, lint-free cloth can often resolve read errors.
Next, verify the disc is inserted correctly, label-side facing upwards. A common problem is improper seating. If the drive attempts to read the disc repeatedly but fails, a potential mechanical issue may exist; Try a different GameCube game to determine if the problem lies with the disc or the drive itself.

In some cases, the laser lens may require cleaning or calibration. While attempting this yourself is risky, professional repair services are available. Avoid using compressed air directly inside the drive, as this can damage sensitive components. If the drive consistently fails to read discs, professional repair or console replacement may be necessary.
Wii Laser Calibration and Repair
The Wii’s laser is crucial for reading both Wii and GameCube discs. If you’re experiencing consistent read errors, laser calibration or repair might be necessary. However, attempting self-repair is strongly discouraged due to the delicate nature of the components and potential for further damage.

Initial troubleshooting should focus on cleaning the laser lens. While specialized cleaning discs exist, their effectiveness is debated. A safer approach is to avoid introducing foreign objects into the drive. If cleaning doesn’t resolve the issue, the laser may be misaligned or failing.
Laser realignment requires specialized tools and expertise. Attempting this without proper knowledge can permanently damage the console. Professional repair services offer laser recalibration and replacement. Be aware that repair costs can sometimes approach the price of a used Wii. Before pursuing repair, consider the console’s age and overall condition. A failing laser often indicates broader system wear and tear.
Resolving FORE000006 Error (Clock Issues)
The dreaded FORE000006 error indicates an incorrect system clock on your Wii. This prevents access to WiiConnect24 features, online services, and can disrupt game functionality. Fortunately, resolving this is usually straightforward.
First, navigate to the Wii System Settings through the main menu. Select “System Settings” then “Date and Time.” Disable “Synchronize Clock via Internet.” Manually set the correct date and time. Ensure the year, month, day, hour, and minute are accurate.
If the error persists after manual correction, completely disconnect the Wii from the power outlet for an extended period – ideally an hour or two. This performs a hard reset of the internal clock. Reconnect the power and repeat the date and time setting process.
In rare cases, a faulty CMOS battery (which maintains the clock when powered off) may be the culprit. Replacing this battery requires opening the console and is best left to experienced technicians.
AC Adapter Resetting Procedures
Power issues are common with the Wii, and often, the AC adapter is the source. Before assuming a failing adapter, a simple reset can frequently restore functionality. This procedure aims to clear any accumulated static electricity or minor internal faults within the power brick.
Begin by completely disconnecting the AC adapter from both the Wii console and the wall power outlet. It’s crucial to remove it from both ends to fully break the connection. Then, allow the adapter to remain unplugged for a substantial period – a minimum of one to two hours is recommended.
This extended disconnection allows any residual charge to dissipate. After the waiting period, reconnect the AC adapter first to the wall outlet, then to the Wii console. Attempt to power on the Wii. If it still fails to power on, consider testing with a known working AC adapter if available.
Remember, consistently failing to power on even after resetting suggests a defective adapter requiring replacement. Always use an official Nintendo AC adapter to avoid potential damage to your console.
Component Video Cable Issues with HDTVs
Connecting a Wii to a modern HDTV using component video cables can sometimes result in display problems, such as a lack of signal or distorted images. This is often due to compatibility issues between the Wii’s analog output and the HDTV’s digital processing.

First, ensure the component cables are securely connected to both the Wii and the HDTV. Verify you’re using the correct color-coded ports – green, blue, and red – on both ends. If the signal remains absent, navigate to your HDTV’s input settings.
Within the HDTV’s menu, locate the input source selection and ensure the correct component video input is chosen. Some HDTVs require manual activation of component inputs. Additionally, explore the HDTV’s display settings; try adjusting the aspect ratio to ‘4:3’ or ‘16:9’ to see if it resolves the issue.
If problems persist, access the Wii’s system settings and confirm the TV resolution is compatible with your HDTV. Experimenting with different resolutions may yield a stable picture. A faulty component cable can also be the culprit; testing with a different cable is advisable.
Identifying Wii Console Revisions
The Nintendo Wii underwent several hardware revisions throughout its lifespan, impacting features and compatibility. Identifying your console’s revision is crucial for troubleshooting and understanding its capabilities. The original Wii (RVL-001) was the first released, but later models addressed overheating and added functionality.
The RVL-101 revision introduced a smaller die size for the CPU and GPU, reducing heat output and power consumption. This model is generally considered more reliable. The RVL-201 further refined the design, offering even greater efficiency. A key identifier is the model number located on the bottom of the console.
To determine your Wii’s revision, carefully inspect the label. The model number (RVL-XXX) will indicate which version you possess. Knowing the revision helps determine compatibility with homebrew software or specific accessories. Certain modifications and exploits may only work on specific revisions.
Checking the revision is also useful when seeking online support, as solutions may vary depending on the hardware. Resources online provide detailed guides for identifying Wii revisions based on serial numbers and physical characteristics.
Wii System Memory (Internal Storage) Errors
The Wii’s internal system memory, a crucial component for storing game data, save files, and channels, can occasionally encounter errors. These issues manifest as slow loading times, game crashes, or the inability to save progress. A common symptom is an error message indicating insufficient memory, even when space appears available.
Initial troubleshooting involves a simple system reset. Power off the Wii completely, disconnect the AC adapter for several minutes, and then reconnect and restart. This can often clear temporary glitches. If the problem persists, consider deleting unnecessary channels or archived Virtual Console titles to free up space.
Corrupted save data can also cause errors. While restoring from a backup is ideal, this isn’t always possible. In severe cases, a system recovery might be necessary, but this will erase all data. Regularly backing up save data to an SD card is highly recommended to prevent data loss.
Avoid interrupting save processes or power cycling the console during data transfers, as this can lead to corruption. If errors continue, a more serious hardware issue with the internal NAND memory may be present, potentially requiring professional repair.
SD Card Troubleshooting for Wii Games
Utilizing an SD card expands the Wii’s storage capacity, enabling the storage of Virtual Console games, WiiWare titles, and save data backups. However, SD card issues can disrupt gameplay. Common problems include the Wii failing to recognize the card, read errors during loading, or corrupted save files.

First, ensure the SD card is properly formatted to FAT32. The Wii doesn’t support other file systems. Use a computer to format the card, but back up any existing data first. A faulty SD card reader within the Wii can also be the culprit; try a different SD card if available.
Corrupted data on the card can cause errors. Regularly backing up save files to a separate storage device is crucial. If the Wii detects errors, attempt to repair the SD card using a computer’s disk checking utility. Avoid removing the SD card during read or write operations.
Furthermore, the SD card’s speed class can impact loading times. While not essential, a faster card (Class 4 or higher) can improve performance. If problems persist, consider replacing the SD card, as they have a limited lifespan.
Troubleshooting Wii MotionPlus Accessories
Wii MotionPlus enhances motion detection, providing more accurate gameplay in compatible titles. However, connectivity and functionality issues can arise. A common problem is the accessory failing to synchronize with the Wii Remote. Ensure the MotionPlus adapter is securely attached to the Remote’s base.
Synchronization issues often stem from low batteries in both the Wii Remote and the MotionPlus accessory. Replace the batteries with fresh ones and repeat the synchronization process (press the red sync button on both devices). Interference from other wireless devices can also disrupt the connection; move away from potential sources.
If the MotionPlus accessory is recognized but doesn’t function correctly in-game, verify the game supports the accessory. Not all Wii games utilize MotionPlus. Check the game’s packaging or manual for compatibility information.
Occasionally, the MotionPlus adapter itself may be faulty. Test it with another Wii Remote to isolate the problem. If the issue persists across multiple Remotes, consider replacing the accessory. Regularly cleaning the connector pins on both the Remote and the adapter can also improve connectivity.
Wii Online Services Connection Problems
Connecting to Wii Online Services allows access to Virtual Console games, WiiConnect24 features, and online multiplayer. However, connection issues are frequent. First, verify your internet connection is active and functioning correctly on other devices. Ensure your Wii is properly connected to your router via Ethernet cable or Wi-Fi.
For Wi-Fi connections, confirm you’ve entered the correct network password and that the signal strength is adequate. Interference from other wireless devices can also cause problems; try changing the Wi-Fi channel on your router. If using an Ethernet cable, check that it’s securely connected to both the Wii and the router.
WiiConnect24 relies on a constant connection; ensure it’s enabled in the Wii’s system settings. Nintendo’s servers occasionally undergo maintenance, causing temporary outages. Check Nintendo’s official website for service status updates.
If problems persist, try resetting your router and modem. You may also need to adjust your router’s firewall settings to allow Wii access. Finally, ensure your Wii’s system date and time are set correctly, as incorrect settings can interfere with online connectivity.
WiiWare Download Errors
Downloading WiiWare titles can sometimes encounter errors, preventing successful installation. Insufficient Wii System Memory is a common cause; delete unnecessary Virtual Console games, save data, or channels to free up space. Ensure you have a stable internet connection, as interruptions during download can lead to corruption.
Check your remaining Wii System Memory before initiating a download. If using an SD card for additional storage, verify it’s properly formatted and has sufficient free space. Corrupted SD card data can also cause download failures; try reformatting the card (back up any important data first!).
Error codes displayed during download can provide clues to the problem. Consult Nintendo’s support website for specific error code meanings and troubleshooting steps. Sometimes, simply restarting the Wii can resolve temporary glitches preventing downloads.
Ensure your Wii’s system date and time are accurate, as incorrect settings can interfere with the Wii Shop Channel’s servers. If the problem persists, contact Nintendo’s customer support for assistance, providing the error code and details of the issue.
Addressing Video Output Issues (No Signal)
Encountering a “No Signal” error on your TV when using the Wii is a frustrating, yet common, problem. First, verify all cable connections – AV, Component, or HDMI – are securely plugged into both the Wii and the TV. Cycle through your TV’s input sources to ensure the correct one is selected for the Wii.
If using Component cables with an HDTV, navigate to the Wii’s System Settings and adjust the video mode to match your TV’s resolution (480i, 480p, or 1080i). Incorrect settings can cause incompatibility. Try a different AV cable to rule out a faulty cable as the source of the issue.
A simple Wii reset can sometimes resolve temporary glitches. Unplug the AC adapter for a minute, then reconnect it. If the problem persists, test the Wii with a different TV to determine if the issue lies with the console or your original television.
Consider the Wii’s revision; some earlier models may have compatibility issues with certain HDTVs. Consult online forums for specific compatibility information related to your TV model.
Wii Software Update Failures
Failed Wii software updates can leave your console unstable or unusable. Before attempting another update, ensure a stable internet connection. Wired connections are generally more reliable than Wi-Fi during updates. Verify sufficient free space on your Wii’s internal memory or SD card, as updates require storage.
If the update consistently fails mid-process, try downloading the update file directly to an SD card on a computer, then installing it via the Wii’s system menu. This bypasses potential network issues. Avoid interrupting the update process; any interruption can corrupt the system software.
Should the update fail repeatedly, a System Recovery may be necessary (refer to the dedicated section for instructions). However, this should be a last resort, as it can erase saved data. Check Nintendo’s support website for the latest update version and any known issues.
Occasionally, a faulty SD card can cause update failures. Try a different, known-good SD card to rule out this possibility. Ensure the SD card is formatted correctly (FAT32) before use.
Performing a System Recovery
System Recovery is a drastic measure to restore a malfunctioning Wii, potentially erasing all saved data and channels. It should only be attempted after exhausting other troubleshooting steps. Begin by completely powering down the Wii – disconnect the AC adapter.
Next, simultaneously hold down the ‘Start’ and ‘Reset’ buttons while reconnecting the AC adapter. Continue holding both buttons until the Wii starts in System Recovery mode. A blue screen will appear with recovery options.
You’ll be presented with options to restore the Wii to its factory settings, or to attempt a channel-by-channel recovery, preserving some data. The factory reset is the most thorough but results in complete data loss. Follow the on-screen prompts carefully.
Be aware that System Recovery can take a significant amount of time. Do not interrupt the process. If the recovery fails, the Wii may require professional repair. Back up important data regularly to an SD card to mitigate data loss in such situations.
Factory Resetting the Wii Console
A Factory Reset returns your Wii to its original, out-of-the-box state, erasing all saved data, downloaded channels, and user settings. This is a powerful troubleshooting step, best reserved for situations where other solutions have failed. Before proceeding, understand that this action is irreversible without backups.
To initiate a factory reset, navigate to the Wii Settings menu from the Home Menu. Select ‘System Settings,’ then ‘Initialization.’ You will be prompted to choose between ‘Restore Wii Settings’ (less comprehensive) and ‘Initialize Wii’ (full factory reset).
Select ‘Initialize Wii.’ The system will display a warning message detailing the data loss. Confirm your decision. The Wii will then begin the reset process, which may take several minutes. Do not interrupt the process by powering off the console.
Upon completion, the Wii will restart, presenting you with the initial setup screens as if it were a new console. You’ll need to reconfigure settings, reconnect to Wi-Fi, and redownload any desired channels. Regular data backups to an SD card are crucial to avoid permanent data loss.
Resources for Further Wii Support
Beyond this manual, numerous resources are available for continued Wii support and troubleshooting. Nintendo’s official website remains a valuable source, offering FAQs, downloadable manuals, and troubleshooting guides for a wide range of issues. (Link to Nintendo Support website would be here).
Online forums and communities dedicated to the Wii, such as Reddit’s r/Wii and dedicated Wii hacking forums, provide a platform for users to share solutions, ask questions, and receive assistance from experienced community members. These forums often contain solutions to niche problems not covered in official documentation.
YouTube channels, like “This Does Not Compute,” offer visual guides and tutorials on Wii repair, calibration, and troubleshooting. These videos can be particularly helpful for tasks requiring physical intervention. (Link to YouTube channel would be here);
Finally, consider professional repair services if you encounter hardware issues beyond your ability to resolve. Local game repair shops or Nintendo’s repair service can diagnose and fix more complex problems. Remember to back up your data before seeking professional assistance.