
Amana S Series Installation: A Comprehensive Guide
Amana S Series installations demand meticulous adherence to the installation manual‚ covering one-unit‚ open-top‚ and closed-top setups for optimal performance and longevity.
Understanding the Amana S Series
Amana S Series systems represent a significant advancement in home comfort technology‚ demanding a thorough understanding of their unique installation requirements. The installation manual is paramount‚ detailing procedures for 1.5 to 3.0 ton units‚ including Enhanced Capacity models. Technicians should familiarize themselves with specific configurations like one-unit installations‚ open-top setups‚ wall-facing inlet side arrangements‚ and closed-top installations.
Proper installation ensures peak efficiency and reliability. The series incorporates communicating modules‚ requiring careful integration and diagnostic awareness – understanding LED display codes is crucial for troubleshooting. Successful installation hinges on precise adherence to the manual’s guidelines‚ guaranteeing optimal performance and maximizing the system’s lifespan for homeowners.
Overview of the S Series Models
The Amana S Series encompasses a range of models‚ from 1.5 to 3.0 ton capacities‚ alongside 2.0 ton Enhanced Capacity options. The installation manual provides tailored guidance for each‚ emphasizing the importance of selecting the correct procedures based on the specific unit. Installation types vary‚ including streamlined one-unit setups‚ adaptable open-top configurations‚ and more complex closed-top installations.
Understanding these distinctions is vital for technicians. The manual details specific wiring requirements and component placements for each model. Proper model identification and adherence to the corresponding installation steps‚ as outlined in the manual‚ are critical for ensuring optimal system performance and avoiding potential issues.
Key Features and Benefits
The Amana S Series boasts high-performance capabilities‚ demanding precise installation as detailed in the installation manual. Key benefits include enhanced efficiency and reliability‚ achievable only through correct setup. The manual highlights features like communicating module integration‚ enabling advanced diagnostics and system monitoring.
Proper installation‚ guided by the manual‚ unlocks these advantages. Technicians benefit from clear wiring diagrams and step-by-step instructions. The manual’s diagnostic LED display code section aids troubleshooting. Ultimately‚ a correctly installed S Series unit delivers superior comfort and energy savings‚ maximizing the homeowner’s investment and ensuring long-term operational efficiency.

Pre-Installation Considerations
Amana S Series installation requires careful pre-checks‚ referencing the installation manual for compatibility‚ electrical needs‚ and necessary tools for a smooth process.
Checking Unit Compatibility
Prior to Amana S Series installation‚ thoroughly verify system compatibility using the detailed guidelines within the installation manual. Confirm the existing ductwork is appropriately sized to handle the unit’s airflow requirements‚ preventing performance issues.
Assess the structural integrity of the mounting location‚ ensuring it can safely support the indoor and outdoor unit weights. Carefully review the manual for specific clearance requirements around the units‚ avoiding obstructions that could hinder airflow or service access.
Confirm voltage and phase match the unit’s specifications. Incorrect electrical connections can cause significant damage. Finally‚ cross-reference the manual’s capacity charts to ensure the selected S Series model aligns with the building’s heating and cooling load calculations.
Electrical Requirements
The Amana S Series installation manual details precise electrical specifications crucial for safe and efficient operation. Typically‚ these units require dedicated circuits with appropriate amperage ratings‚ often ranging from 15 to 30 amps‚ depending on the model’s capacity.
Always verify the voltage matches the unit – commonly 208/240V – and adhere to local electrical codes. Proper grounding is paramount; the manual emphasizes a secure ground connection to prevent electrical hazards.
Disconnect switches must be readily accessible for maintenance and emergencies. Consult the manual’s wiring diagrams for correct connections‚ and utilize appropriately sized wiring to minimize voltage drop. Failure to meet these requirements voids the warranty.
Required Tools and Materials
The Amana S Series installation manual outlines essential tools and materials for a successful setup. Core tools include a refrigerant recovery machine‚ vacuum pump‚ manifold gauge set‚ flaring/swaging tool‚ and electrical multimeter.
Necessary materials encompass refrigerant linesets (properly sized)‚ electrical wiring (meeting code)‚ insulation‚ sealant‚ and mounting hardware. The manual specifies the correct type of refrigerant oil for compatibility.
Additionally‚ a tubing cutter‚ wire strippers‚ screwdrivers‚ and a level are vital. Always refer to the manual’s parts list to ensure all components are available before commencing installation‚ preventing delays and ensuring a compliant installation.
Installation Process: Step-by-Step
Amana S Series installation‚ guided by the manual‚ involves mounting units‚ connecting refrigerant lines‚ precise wiring‚ and careful outdoor unit placement for efficiency.
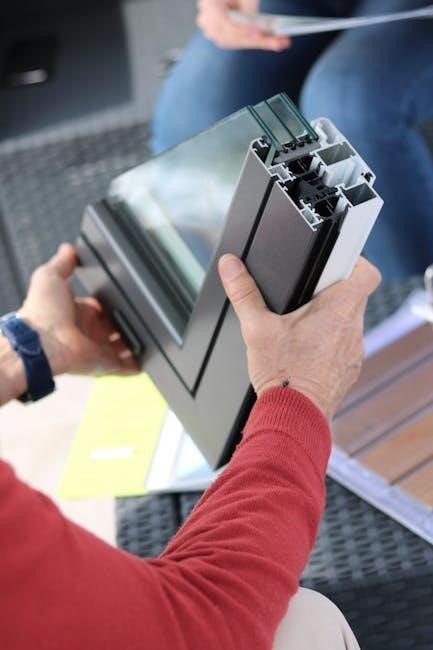
Mounting the Indoor Unit
Proper indoor unit mounting‚ as detailed in the Amana S Series installation manual‚ is crucial for optimal system performance. Begin by selecting a location that allows for adequate airflow and accessibility for future maintenance. Ensure the mounting surface is strong enough to support the unit’s weight‚ utilizing appropriate anchors and fasteners.
Carefully level the unit using shims if necessary‚ preventing vibrations and noise. Adhere strictly to the specified clearances outlined in the manual to avoid obstructions and ensure proper operation. Securely attach the mounting bracket to the wall‚ then carefully lift and position the indoor unit onto the bracket. Double-check all connections and ensure the unit is firmly secured before proceeding to the next step in the installation process. Ignoring these steps can lead to operational issues.
Connecting Refrigerant Lines
Connecting refrigerant lines‚ per the Amana S Series installation manual‚ requires precision to prevent leaks and ensure efficient operation. Begin by purging the lines to remove any air or debris. Carefully align and connect the refrigerant lines to the designated ports on both the indoor and outdoor units‚ utilizing appropriate flare nuts and tightening them to the manufacturer’s specified torque.
Employ nitrogen during brazing to protect the system from contamination. Thoroughly inspect all connections for leaks using a refrigerant leak detector. Proper sealing is paramount; any detected leaks must be addressed immediately. Refer to the manual’s diagrams for correct line sizing and routing to optimize system performance and longevity;
Wiring the Electrical Connections
Wiring the electrical connections‚ as detailed in the Amana S Series installation manual‚ demands strict adherence to safety protocols and local electrical codes. Before commencing‚ ensure the power supply is completely disconnected. Carefully connect the wiring according to the unit’s wiring diagram‚ utilizing appropriately sized wire and secure connections.
Pay close attention to grounding requirements for safety. Technicians facing challenges during their first S series install should double-check wiring configurations. Verify all connections are tight and properly insulated. After wiring‚ conduct a thorough inspection to confirm correct polarity and secure connections before restoring power.
Outdoor Unit Placement and Mounting
The Amana S Series installation manual emphasizes careful consideration for outdoor unit placement and mounting. Select a location ensuring adequate airflow‚ free from obstructions like shrubs or debris. Mount the unit on a level‚ stable surface capable of supporting its weight‚ following the manual’s specified clearances.
Securely fasten the unit using appropriate mounting hardware‚ protecting it from vibration and weather exposure. Proper placement minimizes noise and maximizes efficiency. Technicians should verify local regulations regarding unit proximity to property lines. Ensure sufficient space for servicing and refrigerant line connections‚ as outlined in the manual.

Specific Installation Types
The Amana S Series installation manual details procedures for one-unit setups‚ open-top configurations‚ wall-facing inlet side installations‚ and closed-top applications.
One-Unit Installation Procedures
Amana S Series one-unit installations‚ as outlined in the installation manual‚ require careful attention to detail. Begin by verifying the unit’s physical dimensions align with the designated space‚ ensuring adequate clearance for servicing. Properly mount the indoor unit‚ securing it to a structurally sound surface.
Next‚ connect the refrigerant lines‚ meticulously following the manual’s guidance on proper bending‚ flaring‚ and leak testing. Electrical wiring must adhere to local codes and the manufacturer’s specifications‚ utilizing appropriately sized conductors and secure connections.
Confirm correct voltage and grounding before energizing the system. Thoroughly inspect all connections and components before initiating the initial start-up sequence‚ referencing the manual for specific testing procedures. Finally‚ verify proper operation and document all installation details.
Open Top Installation Guidelines
Amana S Series open-top installations‚ detailed within the installation manual‚ necessitate specific considerations for airflow and accessibility. Ensure sufficient vertical clearance above the unit to accommodate proper air discharge and facilitate future maintenance. The manual emphasizes the importance of unobstructed airflow around the unit‚ avoiding nearby obstructions that could restrict performance.
Securely mount the unit‚ verifying structural integrity and stability. Pay close attention to refrigerant line routing‚ preventing kinking or stress. Electrical connections must comply with local codes and the manual’s wiring diagrams.
Thoroughly test for refrigerant leaks and verify proper system operation post-installation‚ referencing the manual’s diagnostic procedures. Document all installation parameters for future reference.
Wall Facing Inlet Side Installation
The Amana S Series installation manual outlines specific procedures for wall-facing inlet side configurations. This setup requires careful attention to inlet airflow‚ ensuring no obstructions impede the unit’s ability to draw air effectively. Maintain the minimum clearances specified in the manual to prevent performance degradation and potential overheating.
Properly secure the unit to the wall‚ utilizing appropriate mounting hardware capable of supporting its weight. Refrigerant lines should be routed neatly and protected from physical damage. Electrical connections must adhere strictly to the manual’s wiring diagrams and local electrical codes.
Post-installation‚ verify airflow direction and volume‚ and conduct a thorough leak check of all refrigerant connections.
Closed Top Installation Instructions
The Amana S Series installation manual details closed-top installation‚ emphasizing the need for adequate ventilation. This configuration necessitates ensuring sufficient space above the unit for proper airflow and service access. Carefully review the manual’s diagrams to understand the required clearances for safe and efficient operation.
Securely mount the unit‚ verifying structural integrity of the supporting surface. Refrigerant lines must be routed with minimal bends and protected from external factors. Electrical wiring should strictly follow the manual’s schematics and local regulations.
After installation‚ confirm proper airflow and conduct a comprehensive system performance test.

Communicating Module Installation
Amana S Series installation manual references optional communicating modules; the LED display provides diagnostic codes for status and troubleshooting during integration.
Integrating the Communicating Module
Integrating the communicating module with the Amana S Series requires careful attention to the installation manual’s wiring diagrams and specific model instructions. This module enhances system control and diagnostic capabilities‚ allowing for more precise monitoring and adjustments. Technicians must ensure proper connections to the control board‚ adhering to polarity and utilizing the correct wire gauges.
The module facilitates two-way communication between the indoor and outdoor units‚ enabling features like advanced temperature control and remote access. Successful integration is confirmed by verifying the module’s operational status via the diagnostic LED display‚ referencing the corresponding code table within the manual. Proper setup unlocks the full potential of the S Series system.
Diagnostic LED Display Codes
The Amana S Series installation manual details a comprehensive set of diagnostic LED display codes crucial for troubleshooting and verifying system operation. These codes‚ emitted by the communicating module‚ provide technicians with valuable insights into potential issues. Understanding these codes – such as error indications or status confirmations – is paramount for efficient service.
The manual outlines each code’s specific meaning‚ guiding technicians toward targeted solutions. Codes can indicate problems with wiring‚ refrigerant levels‚ fan motors‚ or control board functionality. Accurate interpretation of these signals minimizes diagnostic time and ensures effective repairs‚ ultimately maximizing system performance and homeowner satisfaction. Referencing the manual’s code table is essential.

Troubleshooting Common Issues
Amana S Series installation manual guides technicians through resolving electrical problems‚ refrigerant leaks‚ and fan motor issues for efficient system diagnostics.
Addressing Electrical Problems
Electrical safety is paramount when troubleshooting the Amana S Series. The installation manual stresses verifying correct voltage and amperage before commencing any work. Technicians should meticulously check wiring connections‚ ensuring they are secure and conform to local electrical codes.
Common electrical issues include tripped breakers‚ blown fuses‚ and loose wiring. The manual provides detailed diagrams for identifying and rectifying these problems. Always disconnect power before inspecting or repairing electrical components. Utilizing a multimeter to test continuity and voltage is crucial for accurate diagnosis.
Furthermore‚ the manual highlights the importance of proper grounding to prevent electrical hazards. If issues persist‚ consult a qualified electrician and refer to the diagnostic LED display codes for further assistance.
Refrigerant Leak Detection
The Amana S Series installation manual emphasizes the critical importance of refrigerant leak detection. Technicians must employ approved leak detection methods‚ such as electronic leak detectors or bubble solutions‚ to identify any breaches in the refrigerant lines.
Prior to leak testing‚ ensure the system is properly evacuated according to the manual’s guidelines. Any detected leaks must be immediately repaired using appropriate brazing techniques and materials‚ adhering strictly to industry standards.
Following repairs‚ a thorough pressure test and re-evacuation are essential to confirm the system’s integrity. The manual cautions against releasing refrigerants into the atmosphere and mandates responsible handling procedures‚ complying with all environmental regulations.
Fan Motor Issues
The Amana S Series installation manual details troubleshooting steps for fan motor problems. Common issues include motor failure‚ capacitor malfunctions‚ or wiring discrepancies. Before diagnosing‚ ensure the power supply is disconnected for safety.
The manual instructs technicians to check the motor windings for continuity using a multimeter. A failed capacitor should be replaced with one of the exact same specifications. Inspect wiring connections for looseness or corrosion‚ correcting as needed.
If the motor fails to operate after these checks‚ replacement is often necessary. Always refer to the manual’s parts list for the correct replacement motor and follow the specified installation procedures carefully.

Warranty and Coverage
Amana S Series installation manual highlights a one-time unit and compressor replacement coverage for the original homeowner‚ spanning years 11-99 post-installation.
One-Time Unit Replacement Coverage
Amana S Series installation manual details a significant benefit for original homeowners: One-Time Unit Replacement coverage. This valuable provision extends from years 11 through 99 following the initial installation of the unit. Should the complete system fail during this extended period‚ due to a covered component defect‚ Amana will provide a full replacement of the entire unit.
This coverage offers substantial peace of mind‚ protecting against unforeseen and costly repairs or replacements down the line. It’s crucial to retain proof of installation and adhere to recommended maintenance schedules to remain eligible for this exceptional warranty benefit. The installation manual outlines specific terms and conditions‚ emphasizing the importance of professional installation for valid coverage.
One-Time Compressor Replacement Coverage
The Amana S Series installation manual highlights another key warranty feature: One-Time Compressor Replacement coverage. This benefit‚ also available to the original homeowner for years 11-99 post-installation‚ specifically addresses compressor failures. The compressor is the heart of the cooling system‚ and its failure can be a major expense.
Amana’s coverage provides a full replacement of the compressor should it fail during the specified warranty period. Maintaining proper refrigerant levels and adhering to the recommended maintenance outlined in the installation manual are vital for preserving this coverage. Proper installation by a qualified technician is also essential to ensure eligibility and optimal system performance‚ safeguarding this valuable protection.
Extended Warranty Options
The Amana S Series installation manual briefly mentions the availability of Extended Warranty Options‚ providing homeowners with peace of mind beyond the standard coverage periods. While the manual doesn’t detail specifics‚ it directs installers to explore these options with customers post-installation.
Extended warranties can offer protection against a wider range of potential issues‚ including parts and labor costs for repairs. These plans often extend coverage for components beyond the compressor and unit replacement benefits. Discussing these options ensures homeowners understand their choices for long-term system protection and can tailor a warranty plan to their specific needs and budget‚ complementing the initial warranty provisions.

Safety Precautions
Amana S Series installation manual stresses electrical safety‚ proper refrigerant handling‚ and utilizing correct lifting techniques to prevent injury during the process.
Electrical Safety Guidelines
Electrical safety is paramount during Amana S Series installation. Always disconnect power at the breaker before commencing any wiring work‚ verifying it’s off with a reliable tester. The installation manual details specific wiring diagrams and voltage requirements; strictly adhere to these specifications.
Grounding is crucial – ensure proper grounding connections are established to prevent electrical shock and equipment damage. Use appropriately sized wiring and connectors‚ complying with local electrical codes. Never work on live circuits. Inspect all wiring for damage before connecting‚ and utilize insulated tools.
Double-check all connections for tightness and correct polarity. If unsure about any electrical aspect‚ consult a qualified electrician. Ignoring these guidelines can lead to serious hazards.
Refrigerant Handling Procedures
Refrigerant handling during Amana S Series installation requires strict adherence to EPA regulations and the installation manual’s guidelines. Always use certified technicians trained in proper refrigerant handling techniques. Recover any existing refrigerant from the old system before disconnecting lines‚ preventing environmental release.
When charging the new system‚ use the correct type and amount of refrigerant as specified in the manual. Avoid overcharging or undercharging‚ as this impacts performance and efficiency. Inspect refrigerant lines for leaks after connections are made‚ utilizing leak detection methods.
Properly dispose of any recovered refrigerant according to EPA guidelines. Wear appropriate personal protective equipment‚ including gloves and eye protection‚ when handling refrigerant.
Proper Lifting Techniques
Amana S Series units can be heavy and awkward; therefore‚ employing correct lifting techniques is crucial during installation to prevent injuries. Always lift with your legs‚ keeping your back straight‚ and avoid twisting. Utilize a team lift whenever possible‚ especially with larger outdoor units.
Before lifting‚ assess the weight and ensure a clear path. Use appropriate lifting equipment‚ such as dollies or forklifts‚ for heavier components‚ following manufacturer’s instructions. Secure the unit properly before moving it to prevent shifting or falling.
Communicate clearly with your lifting partner(s) and maintain a firm grip. Wear appropriate safety footwear and gloves for enhanced grip and protection.

Post-Installation Checks
Amana S Series installation requires thorough system performance testing‚ airflow verification‚ and a final inspection using the installation manual’s checklist for optimal operation.
System Performance Testing
System Performance Testing‚ as detailed in the Amana S Series installation manual‚ is crucial for verifying correct operation. Technicians must confirm the unit achieves specified heating and cooling temperatures‚ comparing readings against factory specifications.
Electrical measurements‚ including voltage and amperage‚ should align with the unit’s nameplate data. Refrigerant pressures must fall within the acceptable range outlined in the manual‚ indicating proper charge and leak-free operation.
Furthermore‚ cycle times and compressor performance should be evaluated to ensure efficiency. Documenting all test results provides a baseline for future maintenance and troubleshooting‚ guaranteeing long-term reliability of the Amana S Series system.
Airflow Verification
Airflow Verification‚ a critical step outlined in the Amana S Series installation manual‚ ensures optimal system efficiency and comfort. Technicians must measure airflow at all supply and return registers‚ comparing results to the manufacturer’s specifications for the specific S Series model.
Proper airflow guarantees even temperature distribution throughout the conditioned space. Obstructions in ductwork should be identified and corrected. Static pressure checks confirm adequate fan performance and duct system integrity.
Insufficient airflow can lead to reduced cooling/heating capacity and increased energy consumption. Accurate airflow measurement and adjustment‚ as per the manual‚ are vital for maximizing system performance and homeowner satisfaction.
Final Inspection Checklist
The Amana S Series installation manual details a comprehensive Final Inspection Checklist. This crucial step confirms all work meets manufacturer standards and local codes. Verify secure refrigerant line connections‚ checking for leaks using appropriate methods.
Confirm proper electrical wiring‚ grounding‚ and voltage levels. Inspect the indoor and outdoor units for physical damage or obstructions. Ensure adequate airflow across both coils‚ as previously verified.
Review the system’s operation‚ confirming correct heating and cooling modes. Finally‚ thoroughly explain system operation and maintenance to the homeowner‚ providing the installation manual for future reference.