
Hoover SteamVac Instruction Manual: A Comprehensive Guide
This manual details operation, maintenance, and troubleshooting for Hoover SteamVac models, including the F5914. It covers cleaning carpets, upholstery, and stairs effectively.
Understanding Your Hoover SteamVac
Your Hoover SteamVac is a powerful deep-cleaning solution designed for carpets, rugs, upholstery, and stairs. Different models, like the F7452-900 All Terrain, may vary in color but function similarly. Familiarize yourself with the model and serial number, located on the data label at the back of the handle, for accurate part identification and support.

Understanding the SteamVac’s capabilities ensures optimal cleaning results. It utilizes hot air technology and cleaning solutions to lift dirt and stains. Knowing the specific features of your model – whether it’s a Turbo Power 5200 or a Wide Path model (F6018) – will help you maximize its performance. Proper use extends the lifespan of your appliance.
Model Identification and Variations
Hoover SteamVac models encompass a range of options, from the All Terrain F7452-900 to the older F5914 series and Wide Path models like F6018. Variations primarily involve cosmetic differences, such as color, as noted with the F7452-900. However, core functionality remains consistent across many lines.
Identifying your specific model is crucial for obtaining the correct replacement parts and accessing relevant schematics – like those available at Vacfactsblog.com for F5903-900 through F5914-900. Obsolete parts, such as solution tank assemblies (215-0067) and gaskets (215-0027), may require searching for compatible alternatives. Knowing your model ensures proper maintenance and repair.

Key Components of the SteamVac
The Hoover SteamVac comprises several essential parts. The solution tank holds the cleaning solution, secured by a cap (part 2). A robust power cord, available in replacements like the 50-foot 991-5005, provides energy. Critical for proper operation is the standpipe seal (part number 27), prone to failure and available via diagrams at Vacfactsblog.com.
These components work in unison to deliver effective cleaning. Understanding their function aids in troubleshooting and maintenance. The machine is designed for carpets, rugs, stairs, and upholstery. Proper care of these key elements ensures optimal performance and longevity of your SteamVac.
Solution Tank and Cap
The solution tank is central to the SteamVac’s cleaning process, holding the water and cleaning solution mixture. It’s crucial for delivering the cleaning agent to surfaces. The solution tank cap securely fastens to the tank, preventing leaks during operation. Part number 2, it’s a vital component for safe and effective cleaning.
However, be aware that the solution tank assembly itself is now OBSOLETE (part 215-0067). Similarly, the gasket for circular tanks (part 38784062) is also NO LONGER AVAILABLE. Maintaining a clean tank and a properly sealed cap are essential for optimal performance.
Power Cord (Replacement Options)
The power cord supplies electricity to operate the Hoover SteamVac. Damage to the cord can render the machine unusable and poses a safety hazard. Replacement options are available, though sourcing can be complex due to model variations and part obsolescence.
A 14/3 replacement power cord, 50 feet long and yellow (part 991-5005), is listed as available. However, always verify compatibility with your specific SteamVac model. Exercise extreme caution when replacing the power cord; improper installation can lead to electric shock or fire. If unsure, consult a qualified technician.
Standpipe Seal (Part Number 27)
The standpipe seal, identified as part number 27 in the parts diagram, is a crucial component for maintaining suction during operation. A failing or damaged seal can significantly reduce cleaning effectiveness, leading to poor water extraction and potentially damaging the machine.
This seal ensures a tight connection within the internal plumbing of the SteamVac. A visual inspection should be part of routine maintenance. Replacement is necessary if the seal is cracked, worn, or missing. A blow-up diagram, available at VacFactsBlog, illustrates its location.
Assembly Instructions

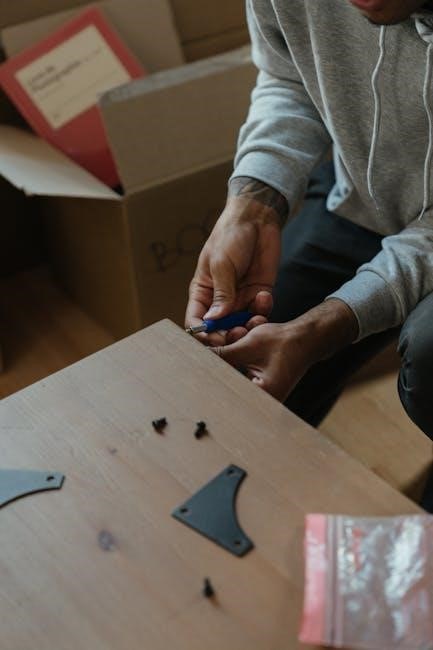
Before initial use, ensure the Hoover SteamVac is correctly assembled. Begin by securely attaching the handle to the main body, verifying a firm click to confirm proper connection. Next, connect the solution tank, aligning it until it locks into place. Ensure the tank is seated correctly to prevent leaks during operation.
Attach any desired tools or accessories, such as the upholstery tool or stair brush, to the hose. The model and serial number, located on the back of the handle, are important for identifying compatible parts. Refer to the parts diagram for correct assembly.
Operating Instructions
To begin cleaning, ensure the solution tank is filled and securely attached. Power on the SteamVac using the power button. The machine is designed for carpets, rugs, stairs, and upholstery. Begin cleaning with slow, overlapping passes for optimal results.
Utilize the trigger to dispense cleaning solution as needed. For heavily soiled areas, multiple passes may be required. Remember to release the trigger when not actively cleaning to conserve solution. After use, power off the machine and disconnect from the power outlet. Always follow safety precautions during operation.
Filling the Solution Tank
Before operation, carefully remove the solution tank from the Hoover SteamVac. Locate the cap and gently unscrew it. Fill the tank with the appropriate cleaning solution, ensuring not to overfill – leave space for proper pressurization.

Use only Hoover-approved cleaning solutions to avoid damaging the machine. Securely tighten the cap onto the tank, ensuring a proper seal to prevent leaks during operation. Reattach the filled tank to the SteamVac, confirming it clicks firmly into place. Incorrectly secured tanks can lead to solution loss and ineffective cleaning.
Powering On and Off
To power on your Hoover SteamVac, first ensure the solution tank is properly seated and the machine is plugged into a grounded outlet. Locate the power switch, typically found on the handle or the main body of the unit. Press the power button to initiate operation; a light indicator may illuminate.
To power off, simply press the power button again. Always unplug the machine from the outlet when not in use or during maintenance. Never force the power button; if it doesn’t respond, check the outlet and power cord connection.
Cleaning Solutions
Hoover SteamVac machines are designed for use with specifically formulated cleaning solutions. Using inappropriate solutions can damage the machine or leave residue on surfaces. Hoover offers a range of solutions for various cleaning needs, including carpet cleaning formulas, upholstery solutions, and pet stain removers.
Always follow the dilution instructions on the cleaning solution packaging. Overuse of solution can lead to excessive suds and reduced cleaning effectiveness. Never use harsh chemicals, bleach, or flammable liquids in your SteamVac. Ensure the solution is compatible with the surface you are cleaning to avoid discoloration or damage.
Cleaning Different Surfaces
The Hoover SteamVac excels at cleaning various surfaces, but requires adjusted techniques. For carpets and rugs, use overlapping strokes and ensure proper solution application. For heavily soiled areas, a slower pace and multiple passes are recommended. When cleaning upholstery and stairs, utilize the appropriate attachments and test a hidden area first to verify colorfastness.
Avoid excessive wetting of upholstery to prevent mildew. On stairs, work from the bottom up to prevent dirty water from running over previously cleaned areas. Always refer to the fabric care label before cleaning delicate materials.
Carpets and Rugs
Cleaning carpets and rugs with your Hoover SteamVac requires a systematic approach. Begin by vacuuming thoroughly to remove loose debris. Fill the solution tank with the appropriate cleaning solution and warm water. Utilize overlapping strokes, moving slowly to allow the machine to effectively lift dirt and stains.
For heavily soiled areas, pre-treat with a stain remover and make multiple passes. Ensure the brushroll is rotating freely for optimal cleaning. After cleaning, allow the carpet to dry completely – proper ventilation speeds up the process. Avoid walking on the damp carpet to prevent re-soiling.
Upholstery and Stairs

Cleaning upholstery and stairs with your Hoover SteamVac demands careful attention. Always test a hidden area first to ensure colorfastness. Utilize the appropriate attachment for upholstery – often a smaller brush or tool. Apply a light mist of cleaning solution, avoiding over-saturation which can damage fabrics.
For stairs, work from the top down to prevent dirty water from re-soiling cleaned areas. Use slow, deliberate strokes, and allow ample drying time. Ensure proper ventilation. Regularly check the solution tank and empty it as needed. Avoid using excessive force, especially on delicate fabrics.
Maintenance and Care
Regular maintenance ensures optimal performance and extends the life of your Hoover SteamVac. After each use, thoroughly clean the solution tank to prevent mold and mildew growth. Rinse it with clean water and allow it to air dry completely. Periodically, inspect and replace filters as needed; clogged filters reduce suction power.
Check the standpipe seal (part number 27) for wear and tear, replacing it if damaged. Inspect the power cord for any signs of fraying or damage. Store the SteamVac in a dry, clean location. Following these simple steps will keep your machine operating efficiently.
Cleaning the Solution Tank
Properly cleaning the solution tank is crucial for preventing unpleasant odors and maintaining hygiene. After every use, detach the tank and empty any remaining cleaning solution. Rinse the tank thoroughly with warm water, ensuring all residue is removed. For stubborn buildup, a mild detergent can be used, followed by a comprehensive rinse.
Inspect the tank cap and gasket (part number 38784062, though potentially obsolete) for debris and clean accordingly. Allow both the tank and cap to air dry completely before reassembling. Regular cleaning prevents mold and mildew, ensuring fresh and effective cleaning performance.
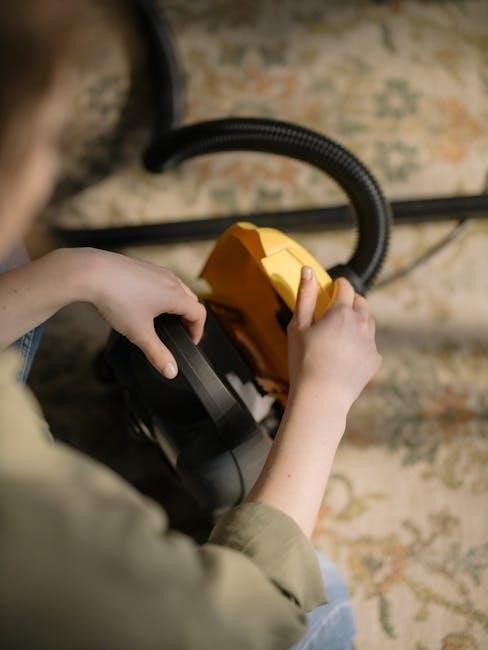
Replacing Filters
Maintaining clean filters is essential for optimal suction and performance of your Hoover SteamVac. Filters should be checked regularly and replaced when visibly dirty or clogged. Refer to your model’s specific parts diagram (like the F5914 schematic) to locate the filter(s).
Remove the old filter carefully, noting its orientation for correct installation of the new one. Ensure the new filter is securely seated to prevent air leakage. Failure to replace filters can lead to reduced cleaning power and potential motor damage. Regularly scheduled filter replacement extends the lifespan of your SteamVac.
Troubleshooting Common Issues
Encountering problems with your Hoover SteamVac? This section addresses frequent concerns. No Suction: Check for clogged hoses, a full solution tank, or a dirty filter. Ensure the standpipe seal (part number 27) is correctly installed and not damaged, as this impacts vacuum power.
Machine Not Powering On: Verify the power cord is securely plugged into a working outlet. Inspect the cord for damage – a 14/3 replacement cord (50ft, yellow) is available. If issues persist, consult the parts diagram for your model (e.g., F5914) to identify potential electrical components.
No Suction
Experiencing a loss of suction with your Hoover SteamVac? Several factors could be the cause. First, thoroughly inspect the hose for any blockages – debris can easily accumulate. Next, check the solution tank; an overly full tank restricts airflow. A dirty filter significantly reduces suction power, so ensure it’s clean or replaced.
Critically, examine the standpipe seal (part number 27). A faulty seal compromises the vacuum’s ability to create suction; Refer to the schematic diagram (for models like F5914) to confirm proper installation. Finally, verify all connections are secure and airtight.
Machine Not Powering On
If your Hoover SteamVac fails to power on, begin with the basics. Confirm the power cord is securely plugged into a functioning outlet. A replacement 14/3 power cord (50ft, yellow ⎼ 991-5005) is available if needed. Inspect the cord for any visible damage – fraying or cuts.
Check the machine’s data label (located on the back of the handle) to verify the model number. While color variations exist (like the F7452900 All Terrain model), the power mechanism is consistent. If the outlet is working and the cord is intact, there may be an internal issue requiring professional service.
Parts Diagrams and Schematics (Model F5914)
Detailed parts diagrams and schematics are crucial for repairs and maintenance of your Hoover SteamVac, specifically model F5914. Vacfactsblog.com provides a comprehensive blow-up diagram, clearly identifying each component, including the standpipe seal (part number 27).
Vacuums R-Us and Sewing Too also offers a parts list and schematic for the F5914 model, accessible online. These resources are invaluable when ordering replacement parts, such as the obsolete solution tank assembly (215-0067) or gasket (215-0027). Refer to these diagrams to ensure correct part identification before purchasing.
Obsolete Parts Information
Locating replacement parts for older Hoover SteamVac models can be challenging due to discontinued manufacturing. Several components are now classified as obsolete, meaning they are no longer readily available for purchase. The solution tank assembly (part number 215-0067) is listed as obsolete, as is the gasket (part number 215-0027) and the hood AES (part number 215-0798).
While direct replacements may be unavailable, exploring online vacuum parts retailers or forums dedicated to Hoover appliances might yield salvaged parts. Always verify compatibility before ordering, and consider alternative solutions if a direct replacement cannot be found. Hoover Solution Tank Cap (38784062) is also noted as no longer available.
Safety Precautions
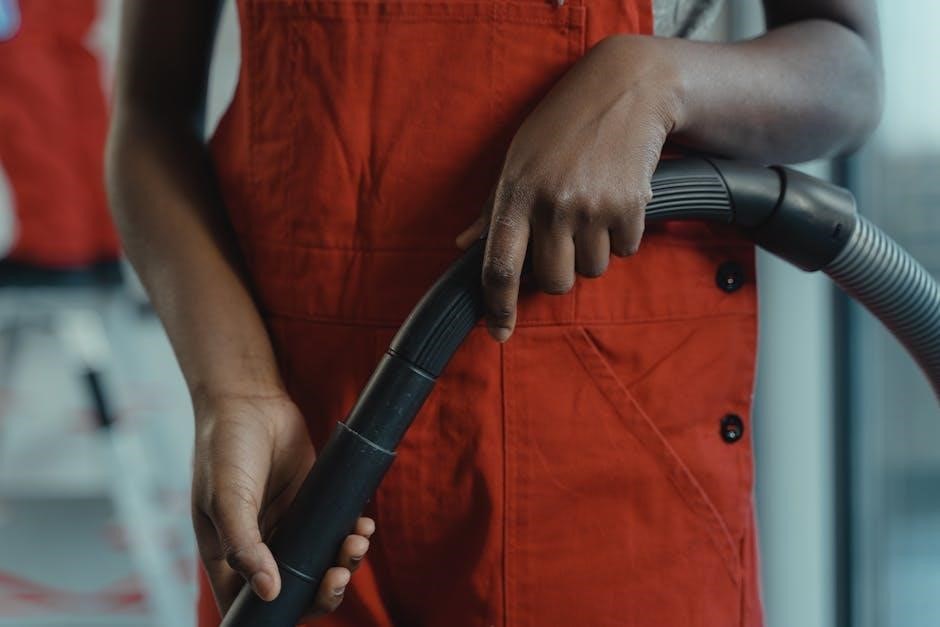
Always disconnect the Hoover SteamVac from the power outlet before performing any maintenance or troubleshooting. Never operate the machine with a damaged cord or plug. Avoid using outdoors or on wet surfaces to prevent electric shock. Ensure the solution tank is securely fastened before operation to prevent spills.
Do not vacuum flammable liquids or materials. Keep children and pets away during operation. Never immerse the machine in water. Allow the unit to cool completely before storing. Use only Hoover-approved cleaning solutions to avoid damage or hazardous reactions. Inspect the machine for damage before each use.
Warranty Information
Hoover SteamVac products are warranted against defects in materials and workmanship for a specified period from the date of purchase. This warranty covers manufacturing flaws under normal household use. Damage due to misuse, abuse, or unauthorized repairs is not covered. Proof of purchase is required for all warranty claims.
The warranty period varies depending on the specific model; consult your product documentation for details. Hoover’s obligation under this warranty is limited to repair or replacement of defective parts. This warranty does not cover normal wear and tear. Contact Hoover customer service for assistance with warranty claims and authorized service centers.
Frequently Asked Questions (FAQ)
Q: What’s the difference between SteamVac models? A: Often, the primary difference is cosmetic – color variations, as seen with the F7452900. Functionally, they are largely the same. Q: Where are the model and serial numbers located? A: They are on the data label located on the back of the handle.
Q: What if a part is obsolete? A: Some parts, like the solution tank assembly and certain gaskets, are no longer available. Explore compatible alternatives or consider professional repair. Q: Can I use any cleaning solution? A: Use only Hoover-approved solutions to avoid damaging the machine. Q: What does part number 27 refer to? A: It’s the standpipe seal.